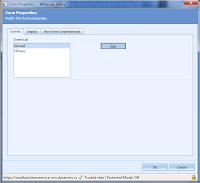
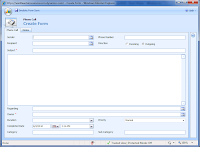
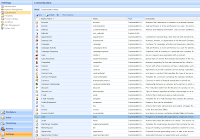
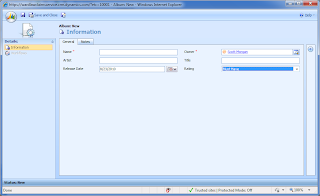
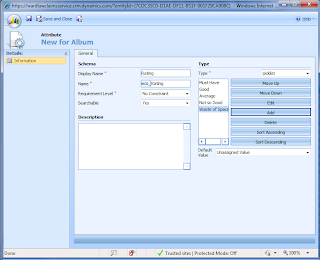
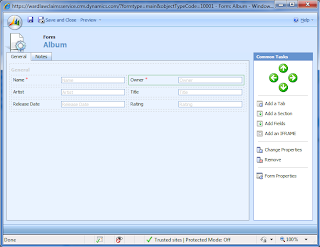
I will customize the Contact entity. Select Forms and Views and then select My Active Contacts (only select we don't want to edit at this time). Now click the More Actions button and Set Default. Now you've changed your default view.


<styletemplates>
<styletemplate name="Template Name">
<label>Name that will be shown in wizard</label>
<styles>
<style name="Name of element to be styled">
[Elements from RDL Style.]
</style>
</styles>
</styletemplate>
</styletemplates>
To add a new template simply copy an old template by selecting all the tags between the </StyleTemplate Name></StyleTemplate> tags and paste after a </StyleTemplate> tag.
<StyleTemplate Name="Slate">
<Label>Slate</Label>
<Styles>
<Style Name="Title">
<FontFamily>Tahoma</FontFamily>
<FontSize>20pt</FontSize>
<Color>SteelBlue</Color>
<FontWeight>Bold</FontWeight>
</Style>
<Style Name="Page Group Level 1">
<FontFamily>Tahoma</FontFamily>
<FontSize>14pt</FontSize>
<Color>SlateGray</Color>
</Style>
<Style Name="Page Group Level 2">
<FontFamily>Tahoma</FontFamily>
<FontSize>12pt</FontSize>
</Style>
<Style Name="Page Group Level 3+">
<FontFamily>Tahoma</FontFamily>
<FontSize>10pt</FontSize>
</Style>
<Style Name="Table"></Style>
<Style Name="Matrix"></Style>
<Style Name="Table Header">
<BackgroundColor>SteelBlue</BackgroundColor>
<FontFamily>Tahoma</FontFamily>
<FontSize>11pt</FontSize>
<FontWeight>Bold</FontWeight>
<Color>White</Color>
<BorderStyle>
<Default>Solid</Default>
</BorderStyle>
<BorderColor>
<Default>LightGrey</Default>
</BorderColor>
</Style>
<Style Name="Group Level 1">
<FontFamily>Tahoma</FontFamily>
<FontSize>10pt</FontSize>
<FontWeight>Bold</FontWeight>
<Color>White</Color>
<BackgroundColor>#6e9eca</BackgroundColor>
<BorderStyle>
<Default>Solid</Default>
</BorderStyle>
<BorderColor>
<Default>LightGrey</Default>
</BorderColor>
</Style>
<Style Name="Group Level 1 Textbox">
<FontFamily>Tahoma</FontFamily>
<FontSize>10pt</FontSize>
<FontWeight>Bold</FontWeight>
<Color>White</Color>
<BackgroundColor>#6e9eca</BackgroundColor>
<BorderStyle>
<Default>Solid</Default>
</BorderStyle>
<BorderColor>
<Default>LightGrey</Default>
</BorderColor>
</Style>
<Style Name="Group Level 2">
<Color>White</Color>
<FontFamily>Tahoma</FontFamily>
<FontSize>10pt</FontSize>
<FontWeight>Bold</FontWeight>
<BackgroundColor>SlateGray</BackgroundColor>
<BorderStyle>
<Default>Solid</Default>
</BorderStyle>
<BorderColor>
<Default>LightGrey</Default>
</BorderColor>
</Style>
<Style Name="Group Level 2 Textbox">
<Color>White</Color>
<FontFamily>Tahoma</FontFamily>
<FontSize>10pt</FontSize>
<FontWeight>Bold</FontWeight>
<BackgroundColor>SlateGray</BackgroundColor>
<BorderStyle>
<Default>Solid</Default>
</BorderStyle>
<BorderColor>
<Default>LightGrey</Default>
</BorderColor>
</Style>
<Style Name="Group Level 3+">
<Color>White</Color>
<FontFamily>Tahoma</FontFamily>
<FontSize>10pt</FontSize>
<FontWeight>Bold</FontWeight>
<BackgroundColor>#8fa0b0</BackgroundColor>
<BorderStyle>
<Default>Solid</Default>
</BorderStyle>
<BorderColor>
<Default>LightGrey</Default>
</BorderColor>
</Style>
<Style Name="Group Level 3+ Textbox">
<Color>White</Color>
<FontFamily>Tahoma</FontFamily>
<FontSize>10pt</FontSize>
<FontWeight>Bold</FontWeight>
<BackgroundColor>#8fa0b0</BackgroundColor>
<BorderStyle>
<Default>Solid</Default>
</BorderStyle>
<BorderColor>
<Default>LightGrey</Default>
</BorderColor>
</Style>
<Style Name="Detail">
<FontFamily>Tahoma</FontFamily>
<FontSize>10pt</FontSize>
<BorderStyle>
<Default>Solid</Default>
</BorderStyle>
<BorderColor>
<Default>LightGrey</Default>
</BorderColor>
</Style>
</Styles>
</StyleTemplate>
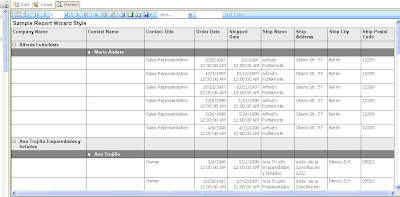
Produces a report that looks like this.
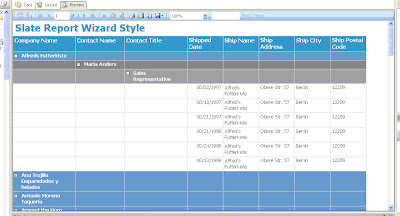
By modifying the xml file. You can change the colors, fonts and other elements to reflect your company’s color themes and styles.
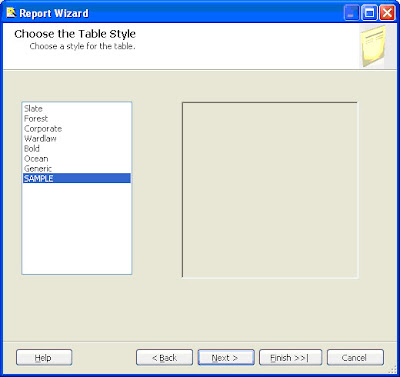
I’ve added a style called SAMPLE to the StyleTemplates.xml
<StyleTemplate Name="SAMPLE">
<Label>SAMPLE</Label>
<Styles>
<Style Name="Title">
<FontFamily>Arial</FontFamily>
<FontSize>12pt</FontSize>
<Color>#000000</Color>
<FontWeight>Bold</FontWeight>
</Style>
<Style Name="Page Group Level 1">
<FontFamily>Arial</FontFamily>
<FontSize>10pt</FontSize>
<Color>#ebebeb</Color>
</Style>
<Style Name="Page Group Level 2">
<FontFamily>Arial</FontFamily>
<FontSize>10pt</FontSize>
</Style>
<Style Name="Page Group Level 3+">
<FontFamily>Arial</FontFamily>
<FontSize>8pt</FontSize>
</Style>
<Style Name="Table"></Style>
<Style Name="Matrix"></Style>
<Style Name="Table Header">
<BackgroundColor>#ebebeb</BackgroundColor>
<FontFamily>Arial</FontFamily>
<FontSize>10pt</FontSize>
<FontWeight>Bold</FontWeight>
<Color>#000000</Color>
<BorderStyle>
<Default>Solid</Default>
</BorderStyle>
<BorderColor>
<Default>#000000</Default>
</BorderColor>
</Style>
<Style Name="Group Level 1">
<FontFamily>Arial</FontFamily>
<FontSize>10pt</FontSize>
<FontWeight>Bold</FontWeight>
<Color>#000000</Color>
<BackgroundColor>#ebebeb</BackgroundColor>
<BorderStyle>
<Default>Solid</Default>
</BorderStyle>
<BorderColor>
<Default>#000000</Default>
</BorderColor>
</Style>
<Style Name="Group Level 1 Textbox">
<FontFamily>Arial</FontFamily>
<FontSize>10pt</FontSize>
<FontWeight>Bold</FontWeight>
<Color>#000000</Color>
<BackgroundColor>#ebebeb</BackgroundColor>
<BorderStyle>
<Default>Solid</Default>
</BorderStyle>
<BorderColor>
<Default>#000000</Default>
</BorderColor>
</Style>
<Style Name="Group Level 2">
<Color>White</Color>
<FontFamily>Arial</FontFamily>
<FontSize>10pt</FontSize>
<FontWeight>Bold</FontWeight>
<BackgroundColor>SlateGray</BackgroundColor>
<BorderStyle>
<Default>Solid</Default>
</BorderStyle>
<BorderColor>
<Default>#000000</Default>
</BorderColor>
</Style>
<Style Name="Group Level 2 Textbox">
<Color>White</Color>
<FontFamily>Arial</FontFamily>
<FontSize>10pt</FontSize>
<FontWeight>Bold</FontWeight>
<BackgroundColor>SlateGray</BackgroundColor>
<BorderStyle>
<Default>Solid</Default>
</BorderStyle>
<BorderColor>
<Default>#000000</Default>
</BorderColor>
</Style>
<Style Name="Group Level 3+">
<Color>White</Color>
<FontFamily>Tahoma</FontFamily>
<FontSize>10pt</FontSize>
<FontWeight>Bold</FontWeight>
<BackgroundColor>#8fa0b0</BackgroundColor>
<BorderStyle>
<Default>Solid</Default>
</BorderStyle>
<BorderColor>
<Default>#000000</Default>
</BorderColor>
</Style>
<Style Name="Group Level 3+ Textbox">
<Color>White</Color>
<FontFamily>Tahoma</FontFamily>
<FontSize>10pt</FontSize>
<FontWeight>Bold</FontWeight>
<BackgroundColor>#8fa0b0</BackgroundColor>
<BorderStyle>
<Default>Solid</Default>
</BorderStyle>
<BorderColor>
<Default>#000000</Default>
</BorderColor>
</Style>
<Style Name="Detail">
<FontFamily>Tahoma</FontFamily>
<FontSize>10pt</FontSize>
<BorderStyle>
<Default>Solid</Default>
</BorderStyle>
<BorderColor>
<Default>#000000</Default>
</BorderColor>
</Style>
</Styles>
</StyleTemplate>
Once I have saved the file, I am ready to create a new report. Simply select the new report style from the report wizard.
An example of the SAMPLE style report is below:
