Showing posts with label JavaScript. Show all posts

Monday, February 28, 2011

Providing Default Values to Wijmo Tooltips

The Wijmo Tooltip widget has certain properties set to default values.  Developers may find that  these defaults are not appropriate for the web site we are using them in.  In this post I will demonstrate how to provide your own default options for the Wijmo Tooltip widget without modifying the Wijmo source code.  This will allow you to attach tooltips to your markup without needing to duplicate the options object you provide on every page.

By default the display of the tooltip will include a callout element.  This is the wedge that points the tooltip bubble to the element the tooltip is associated with.  Below is a screenshot of a tooltip which includes the callout.
If I want to omit the callout element I can do so by using the showCallout option and setting the value to false.  Rather than include this option everytime the tooltip is used I can add a JavaScript file that will override the default options for the tooltip.  Below is the content of the file.


jQuery(document).ready( function() {
 jQuery.extend( jQuery.wijmo.wijtooltip.prototype.options, { showCallout: false } );
});


Note that I have used jQuery's extend method to merge my default values into those used by the Wijmo tooltip.

Here is a screenshot of the tooltip without the callout.
I will need to include the file which includes my custom configuration after the Wijmo tooltip file is included.  Below is the complete HTML code for the example. Note that the "custom-options.js" file is included after the usual jQuery and Wijmo files.  This will cause any Wijmo tooltips included on the page to use the new default settings which will not display the callout element.  I would include this JS file on every page of my site that uses Wijmo in order to set my own default values without modifying the Wijmo source code.
<!doctype html>
<html>
<head>
 <title>Wijmo Tooltip - Set Defaults</title>
 <link type="text/css" rel="stylesheet" href="jquery.ui.all.css">
 <link type="text/css" rel="stylesheet" href="jquery.wijmo-open.1.1.2.css">
 <script type="text/javascript" src="jquery-1.4.4.min.js"></script>
 <script type="text/javascript" src="jquery-ui-1.8.7.custom.min.js"></script>
 <script type="text/javascript" src="jquery.wijmo-open.1.1.2.min.js"></script>
 <script type="text/javascript" src="custom-options.js"></script> 
</head>
<body>

<h1>Weather Tooltip - Customized Defaults</h1>

<div>
 <ul id="cityList">
  <li data-zipcode="78701"><span class="x-tooltip">Austin, TX</span></li>
  <li data-zipcode="75210"><span class="x-tooltip">Dallas, TX</span></li>
  <li data-zipcode="76710"><span class="x-tooltip">Waco, TX</span></li>
 </ul>
</div>

<script type="text/javascript">
 
 jQuery(document).ready(function() {

  jQuery("#cityList>li>span.x-tooltip").each(function() {

   var item = jQuery(this);

   item.wijtooltip({ content: item.parent().attr("data-zipcode") });

  });
    
 });

</script>

</body>
</html>

References

Wijmo - The Wijmo JavaScript and CSS files are available at the Wijmo website, as are the required jQuery files.

http://www.wijmo.com

Wednesday, December 22, 2010

The Select Form Element in jQuery Mobile

The jQuery Mobile (JQM) framework includes a set of CSS, images, and JavaScript based behaviors that override the default look and behavior of form elements. In this blog post I will discuss the select control. I think the jQuery team has done an excellent job overall with the jQuery Mobile framework and that I am currently working with an alpha version, not a final release of the code.


The JQM select control works by replacing a standard HTML select element with a jQuery widget. This widget removes HTML select control by placing it outside the visible area of the browser window using CSS positioning. Below is the CSS snipet in question. It can be found in the jquery.mobile-1.0a2.css file.

.ui-select select { position: absolute; left: -99999px; }

The select element is then replaced by the mobile.selectmenu defined in the jquery.mobile-1.0a2.js file.  The select element is replaced by a style anchor tag and the select's options are moved into an unordered list.  The unordered list is displayed as a modal dialog when the anchor is clicked.

Here is a screen shot of a jQuery Mobile select widget that allows a user to select a U.S. state.


Here is the model dialog that displays the select options.


As you can see the implementation is visually very attractive, in my opinion.  However the alpha implementation seems buggy.  In my experience the when the options modal dialog is closed the form page sometimes moves to the top rather than displaying the area that visible when the select anchor was clicked.   Mobile browser makers have done a good job making select controls easy to use and there isn't a significant benefit to be gained from re-implementing the select control.

In order to restore the default select element I have created a very basic patch that will override the JQM widget.  Below is the relevant code which needs to be invoked in the document ready event.  I have provided a link to a page that contains an example of the replacement widget including the JavaScript code at the end of this post.


jQuery.widget( "mobile.selectmenu", $.mobile.widget, {

 options: {

  theme: null

 }, //end options


 _create: function(){

  var select = this.element,

   o = this.options,

   theme = o.theme;


  //get parent's theme 

  if ( !theme ) {

   var themedParent = this.element.closest("[class*='ui-bar-'],[class*='ui-body-']"); 

   theme = themedParent.length ?

   /ui-(bar|body)-([a-z])/.exec( themedParent.attr("class") )[2] :

   "c";

  } 


  //apply styling to label

   selectID = select.attr( "id" );

  label = $( "label[for="+ selectID +"]" ).addClass( "ui-select" ); 

  select.addClass("ui-corner-all ui-shadow-inset ui-body-null ui-body-" + theme);  


  //apply additional styles/markup to more closly match select element with input elements

  select.css("font-size", "100%");

  select.css("padding", ".4em");

  select.wrap('
'); select.css("margin-bottom",".3em"); } //end _create function });

Below is a screen shot of the resulting page.  The select element uses the default behavior for the Safari browser.  The control has also been styled to appear similar to the input controls on the form.  Please note that the code above is intended as a proof of concept, use at your own risk.


References

jQuery Mobile Project
http://jquerymobile.com

Page which uses jQuery Select Element
http://www.customdatasys.com/jqm/v1/form.html

Page which uses the patch
http://www.customdatasys.com/jqm/v1/form-modselect.html

Tuesday, December 21, 2010

Using jQuery Mobile on a Form Page

In this post I will be marking up a web page that contains a form for use with the jQuery Mobile (JQM) Framework. This post is part of a series of in which I convert a simple site form managing contacts consisting of several XHTML pages to HTML 5 pages which use JQM.

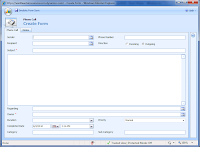
The page I will be using in this demonstration simulates the data entry page for adding a new contact.  It contains the usual form controls: text boxes, checkboxes, radio buttons, and a select element.  Here is a screen shot of the original (non-JQM) XHTML page in the iPhone 4 Safari browser.


Here is the XHTML markup.

<!DOCTYPE html PUBLIC "-//W3C//DTD XHTML Basic 1.1//EN"

    "http://www.w3.org/TR/xhtml-basic/xhtml-basic11.dtd">

<html xmlns="http://www.w3.org/1999/xhtml">

<head>

 <title>A Simple Site | New Entry</title>

</head>

<body>

<div>

<a href="index.html">Contact List</a> || <a href="form.html">New Entry</a><br />

</div>


<h1>New Entry</h1>


<form method="post" action="result.html">


 <fieldset> 

  <legend>Contact Type</legend>


  <input type="checkbox" id="isBusiness" name="isBusiness" value="yes" /><label for="isBusiness">Is a Business Contact</label><br />

  <input type="checkbox" id="isPersonal" name="isPersonal" value="yes" /><label for="isPersonal">Is a Personal Contact</label><br />


 </fieldset> 


 <fieldset>

  <legend>Name & Organization</legend>


  <label for="lastName">Last Name</label><br />

  <input name="lastName" id="lastName" type="text" /><br />


  <label for="firstName">First Name</label><br />

  <input name="firstName" id="firstName" type="text" /><br />


  <label>Salutation</label><br />

  <input id="salutation-mr" name="salutation" value="Mr." type="radio" /> <label for="salutation-mr">Mr.</label> 

  <input id="salutation-ms" name="salutation" value="Ms." type="radio" /> <label for="salutation-ms">Ms.</label> 

  <input id="salutation-dr" name="salutation" value="Dr." type="radio" /> <label for="salutation-dr">Dr.</label><br />


  <label for="organization">Organization</label><br />

  <input name="organization" id="organization" type="text" /><br />


 </fieldset>


 <fieldset>

  <legend>Phone Numbers</legend>


  <label for="mobilePhone">Mobile Phone</label><br />

  <input name="mobilePhone" id="mobilePhone" type="text" /><br />


  <label for="workPhone">Work Phone</label><br />

  <input name="workPhone" id="workPhone" type="text" /><br />


  <label for="homePhone">Home Phone</label><br />

  <input name="homePhone" id="homePhone" type="text" /><br />


 </fieldset>


 <fieldset>

  <legend>Address</legend>


  <label for="street">Street</label><br />

  <input name="street" id="street" type="text" /><br />


  <label for="city">City</label><br />

  <input name="city" id="city" type="text" /><br />


  <label for="state">State</label><br />

  <select name="state" id="state">

   <option value=""></option>

   <option value="AL">Alabama</option>

   <option value="AK">Alaska</option>

   <option value="AZ">Arizona</option>

   <option value="AR">Arkansas</option>

   <option value="CA">California</option>

   <option value="CO">Colorado</option>

   <option value="CT">Connecticut</option>

   <option value="DE">Delaware</option>

   <option value="FL">Florida</option>

   <option value="GA">Georgia</option>

   <option value="HI">Hawaii</option>

   <option value="ID">Idaho</option>

   <option value="IL">Illinois</option>

   <option value="IN">Indiana</option>

   <option value="IA">Iowa</option>

   <option value="KS">Kansas</option>

   <option value="KY">Kentucky</option>

   <option value="LA">Louisiana</option>

   <option value="ME">Maine</option>

   <option value="MD">Maryland</option>

   <option value="MA">Massachusetts</option>

   <option value="MI">Michigan</option>

   <option value="MN">Minnesota</option>

   <option value="MS">Mississippi</option>

   <option value="MO">Missouri</option>

   <option value="MT">Montana</option>

   <option value="NE">Nebraska</option>

   <option value="NV">Nevada</option>

   <option value="NH">New Hampshire</option>

   <option value="NJ">New Jersey</option>

   <option value="NM">New Mexico</option>

   <option value="NY">New York</option>

   <option value="NC">North Carolina</option>

   <option value="ND">North Dakota</option>

   <option value="OH">Ohio</option>

   <option value="OK">Oklahoma</option>

   <option value="OR">Oregon</option>

   <option value="PA">Pennsyvania</option>

   <option value="RI">Rhode Island</option>

   <option value="SC">South Carolina</option>

   <option value="SD">South Dakota</option>

   <option value="TN">Tennessee</option>

   <option value="TX">Texas</option>

   <option value="UT">Utah</option>

   <option value="VT">Vermont</option>

   <option value="VA">Virginia</option>

   <option value="WA">Washington</option>

   <option value="DC">Washington DC</option>

   <option value="WV">West Virginia</option>

   <option value="WI">Wisconsin</option>

   <option value="WY">Wyoming</option>

  </select><br />


  <label for="zipCode">Zip Code</label><br />

  <input name="zipCode" id="zipCode" type="text" /><br />


  <label for="emailAddress">E-mail Address</label><br />

  <input name="emailAddress" id="emailAddress" type="text" /><br />


  <label for="webSite">Web Site</label><br />

  <input name="webSite" id="webSite" type="text" /><br />


 </fieldset>


 <fieldset>

  <legend>Personal Information</legend>


  <label for="birthday">Birthday</label><br />

  <input name="birthday" id="birthday" type="text" /><br />


  <label for="spouse">Spouse</label><br />

  <input name="spouse" id="spouse" type="text" /><br />


  <label for="notes">Notes</label><br />

  <textarea id="notes" name="notes" rows="15" cols="35"></textarea>


 </fieldset>


 <div>

  <input type="submit" value="Save" /> <input type="reset" value="Cancel" />

 </div>


</form>


</body>

</html> 

Here is a screen shot of the JQM version of the page in the iPhone 4 Safari browser.


Here is the markup for the jQuery Moblie version of the page.

<!doctype html> <!-- use HTML 5 doctype -->

<html>

<head>

 <title>A Simple Site | New Entry</title>


 <!-- CSS and scripts required for jQuery mobile -->

 <link rel="stylesheet" href="jquery.mobile-1.0a2.css" />

 <script type="text/javascript" src="jquery-1.4.4.js"></script>


 <!-- disable jQuerymobile's default AJAX page navigation, so that hyperlinks work as usual

 see: http://jquerymobile.com/demos/1.0a2/docs/api/globalconfig.html 

 -->

 <script type="text/javascript" src="custom-mobile-config.js"></script>


 <script type="text/javascript" src="jquery.mobile-1.0a2.js"></script>
 

</head>

<body>

<div data-role="page" data-theme="b">


 <div data-role="header">

  <div data-role="navbar">

   <ul>

    <li><a href="index.html">Contacts List</a></li>

    <li><a href="form.html">New Entry</a></li>

   </ul>

  </div> <!-- end navbar -->


  <h1>New Entry</h1>

 </div><!-- end header -->


 <form method="get" action="detail.html"> <!-- this would normally post, however for this demo we'll merely GET the detail page -->


  <!-- add data-role="fieldcontain" and "controlgroup" for form styling -->

  <div data-role="fieldcontain"> 


   <fieldset data-role="controlgroup"> 

    <legend>Contact Type</legend>


     <input type="checkbox" id="isBusiness" name="isBusiness" value="yes" /><label for="isBusiness">Is a Business Contact</label> 

     <input type="checkbox" id="isPersonal" name="isPersonal" value="yes" /><label for="isPersonal">Is a Personal Contact</label> 

   </fieldset> 


   <fieldset data-role="controlgroup">

    <legend>Name & Organization</legend>


    <label for="lastName">Last Name</label>

    <input name="lastName" id="lastName" type="text" /><br />


    <label for="firstName">First Name</label>

    <input name="firstName" id="firstName" type="text" /><br />


    <label>Salutation</label> 

    <input id="salutation-mr" name="salutation" value="Mr." type="radio" /> <label for="salutation-mr">Mr.</label> 

    <input id="salutation-ms" name="salutation" value="Ms." type="radio" /> <label for="salutation-ms">Ms.</label> 

    <input id="salutation-dr" name="salutation" value="Dr." type="radio" /> <label for="salutation-dr">Dr.</label><br />


    <label for="organization">Organization</label> <!-- in landscape on iPhone end of this text will be hidden under the textbox, a possible work-around is to style labels with style="display: block;" -->

    <input name="organization" id="organization" type="text" /><br />


   </fieldset>


   <fieldset data-role="controlgroup">

    <legend>Phone Numbers</legend>


    <label for="mobilePhone">Mobile Phone</label> 

    <input name="mobilePhone" id="mobilePhone" type="tel" /><br /><!-- input type to HTML 'tel' -->


    <label for="workPhone">Work Phone</label> 

    <input name="workPhone" id="workPhone" type="tel" /><br /><!-- input type to HTML 'tel' -->


    <label for="homePhone">Home Phone</label> 

    <input name="homePhone" id="homePhone" type="tel" /><br /><!-- input type to HTML 'tel' -->


   </fieldset>


   <fieldset data-role="controlgroup">

    <legend>Address</legend>


    <label for="street">Street</label> 

    <input name="street" id="street" type="text" /><br />


    <label for="city">City</label> 

    <input name="city" id="city" type="text" /><br /> 

    <label for="state">State</label> 

    <select name="state" id="state">

     <option value="">Select state</option>

     <option value="AL">Alabama</option>

     <option value="AK">Alaska</option>

     <option value="AZ">Arizona</option>

     <option value="AR">Arkansas</option>

     <option value="CA">California</option>

     <option value="CO">Colorado</option>

     <option value="CT">Connecticut</option>

     <option value="DE">Delaware</option>

     <option value="FL">Florida</option>

     <option value="GA">Georgia</option>

     <option value="HI">Hawaii</option>

     <option value="ID">Idaho</option>

     <option value="IL">Illinois</option>

     <option value="IN">Indiana</option>

     <option value="IA">Iowa</option>

     <option value="KS">Kansas</option>

     <option value="KY">Kentucky</option>

     <option value="LA">Louisiana</option>

     <option value="ME">Maine</option>

     <option value="MD">Maryland</option>

     <option value="MA">Massachusetts</option>

     <option value="MI">Michigan</option>

     <option value="MN">Minnesota</option>

     <option value="MS">Mississippi</option>

     <option value="MO">Missouri</option>

     <option value="MT">Montana</option>

     <option value="NE">Nebraska</option>

     <option value="NV">Nevada</option>

     <option value="NH">New Hampshire</option>

     <option value="NJ">New Jersey</option>

     <option value="NM">New Mexico</option>

     <option value="NY">New York</option>

     <option value="NC">North Carolina</option>

     <option value="ND">North Dakota</option>

     <option value="OH">Ohio</option>

     <option value="OK">Oklahoma</option>

     <option value="OR">Oregon</option>

     <option value="PA">Pennsyvania</option>

     <option value="RI">Rhode Island</option>

     <option value="SC">South Carolina</option>

     <option value="SD">South Dakota</option>

     <option value="TN">Tennessee</option>

     <option value="TX">Texas</option>

     <option value="UT">Utah</option>

     <option value="VT">Vermont</option>

     <option value="VA">Virginia</option>

     <option value="WA">Washington</option>

     <option value="DC">Washington DC</option>

     <option value="WV">West Virginia</option>

     <option value="WI">Wisconsin</option>

     <option value="WY">Wyoming</option>

    </select><br />


    <label for="zipCode">Zip Code</label> 

    <input name="zipCode" id="zipCode" type="text" /><br />
  

    <label for="emailAddress">E-mail Address</label> 

    <input name="emailAddress" id="emailAddress" type="email" /><br /> <!-- input type to HTML 'email' -->


    <label for="webSite">Web Site</label> 

    <input name="webSite" id="webSite" type="url" /><br /> <!-- input type to HTML 'url' -->


   </fieldset>


   <fieldset data-role="controlgroup">

    <legend>Personal Information</legend>


    <label for="birthday">Birthday</label> 

    <input name="birthday" id="birthday" type="date" /><br /><!-- input type to HTML 'date' -->

  
    <label for="spouse">Spouse</label> 

    <input name="spouse" id="spouse" type="text" /><br />

  
    <label for="notes">Notes</label> 

    <textarea id="notes" name="notes" rows="15" cols="35"></textarea>


   </fieldset>

   <fieldset class="ui-grid-a"> <!-- use two column layout here, also add explicit themes to make buttons look different from each other -->

    <div class="ui-block-a"><input type="submit" value="Save" data-theme="b" /></div>

    <div class="ui-block-b"><input type="reset" value="Cancel" data-theme="a"  /></div>

   </fieldset> 


  </div> <!-- end fieldcontain -->

 </form>

</div> <!-- end page div -->

</body>

</html>


To add JQM to the page the doctype has been changed to HTML 5 and the JQM CSS and JavaScript files have been added.  This has been covered in a previous post.  The code above contains some form specific changes.  The contents of the form have been wrapped in a div with a data-role of "fieldcontain".  This will apply form related changes to the content.  Each fieldset has a data-role of "controlgroup".  This change is needed to group the contained checkboxes and radio buttons together by specifying that they are in related grouping.  For the submit and reset buttons I've added a ui-grid and ui-block classes to the markup that will render the fieldset in a two column layout.  The ui-grid defines the wrapped and the ui-block-a and b specify the content of the columns.  I've given the buttons themselves explicit data-theme attributes so they will appear visually distinct from one another.


Some form input text box elements have been changed to HTML 5 specific form elements that replace the usual "text" input type.  Text boxes that will be used to enter telephone numbers have a type of "tel".  Those that are used for an email address have a type  of "email" and so forth.  Ideally the browser would render a datepicker for "date" inputs, allow only URLs in a "url" input and limit the data entered to the appropriate type.  Based on my testing in iPhone and Safari it appears that "tel" will result in numbers keypad rather than the QWERTY keypad being used for data entry, but the other types are not supported.


References
jQuery Mobile Project

http://jquerymobile.com

XHTML version of the page used in this post 
http://www.customdatasys.com/jqm/start/form.html 


The HTML 5 / JQM version of the page used in this post
http://www.customdatasys.com/jqm/v1/form.html

HTML 5 Input Types
http://www.w3.org/TR/html5/the-input-element.html#attr-input-type


Monday, December 20, 2010

Using jQuery Mobile Collapsible Sections

In this post I will be adding collapsible sections to a mobile web page using the jQuery Mobile (JQM) framework.  This post is part of a series of in which I convert a simple site form managing contacts consisting of several XHTML pages to HTML 5 pages which use JQM.


The page I will be using in this demonstration is the home page for the contacts web site.  It displays a list of contacts and links to other pages on the site.  Here is a screen shot of the XHTML page in the iPhone 4 Safari browser.


Next is the XHTML for the page.

<!DOCTYPE html PUBLIC "-//W3C//DTD XHTML Basic 1.1//EN"

    "http://www.w3.org/TR/xhtml-basic/xhtml-basic11.dtd">

<html xmlns="http://www.w3.org/1999/xhtml">

<head>

 <title>A Simple Site | Contact List</title>

</head>

<body>

<div>

<a href="index.html">Contact List</a>  ||  <a href="form.html">New Entry</a><br />

</div>


<h1>Contact List</h1>


<dl>

 <dt>Adams, Abel</dt>

 <dd>

  Mobile Phone: <a href="tel:555-555-1111">555-555-1111</a><br />

  Home Phone: <a href="tel:555-555-2222">555-555-2222</a><br />

  Work Phone: <a href="tel:555-555-3333">555-555-2222</a><br />

  E-mail Address: <a href="mailto:adams@example.com">adams@example.com</a><br />

  <a href="detail.html">More…</a>

 </dd>


 <dt>Baker, Bonnie</dt>

 <dd>

  Mobile Phone: <a href="tel:555-555-4444">555-555-4444</a><br />

  E-mail Address: <a href="mailto:baker@example.com">baker@example.com</a><br />

  <a href="detail.html">More…</a>

 </dd>


 <dt>Cooper, Charles</dt>

 <dd>

  Mobile Phone: <a href="tel:555-555-5555">555-555-5555</a><br />

  Work Phone: <a href="tel:555-555-6666">555-555-6666</a><br />

  E-mail Address: <a href="mailto:cooper@example.com">cooper@example.com</a><br />

  <a href="detail.html">More…</a>

 </dd>


 <dt>Davis, Donald</dt>

 <dd>

  Mobile Phone: <a href="tel:555-555-7777">555-555-7777</a><br />

  Home Phone: <a href="tel:555-555-8888">555-555-8888</a><br />

  Work Phone: <a href="tel:555-555-9999">555-555-9999</a><br />

  E-mail Address: <a href="mailto:davis@example.com">davis@example.com</a><br />

  <a href="detail.html">More…</a>

 </dd>


</dl>

</body>

</html> 


Here is screen shot of the HTML5/JQM version of the page.


<!doctype html>

<html>

<head>

 <title>A Simple Site | Contact List</title> 

 <link rel="stylesheet" href="jquery.mobile-1.0a2.css" />

 <script type="text/javascript" src="jquery-1.4.4.js"></script>

 <script type="text/javascript" src="custom-mobile-config.js"></script>

 <script type="text/javascript" src="jquery.mobile-1.0a2.js"></script>

</head>

<body>


<div data-role="page" data-theme="b">

 <div data-role="header">

  <div data-role="navbar">

   <ul>

    <li><a href="index.html">Contacts List</a></li>

    <li><a href="form.html">New Entry</a></li>

   </ul>

  </div>  


  <h1>Contact List</h1>

 </div> 


 <div data-role="content">


  <!-- put contacts in collapsable sections -->

  <div data-role="collapsible">

   <h2>Adams, Abel</h2>

   Mobile Phone: <a href="tel:555-555-1111">555-555-1111</a><br />

   Home Phone: <a href="tel:555-555-2222">555-555-2222</a><br />

   Work Phone: <a href="tel:555-555-3333">555-555-2222</a><br />

   E-mail Address: <a href="mailto:adams@example.com">adams@example.com</a><br />

   <a href="detail.html">More…</a>

  </div>


  <div data-role="collapsible">

   <h2>Baker, Bonnie</h2>

   Mobile Phone: <a href="tel:555-555-4444">555-555-4444</a><br />

   E-mail Address: <a href="mailto:baker@example.com">baker@example.com</a><br />

   <a href="detail.html">More…</a>

  </div>


  <div data-role="collapsible">

   <h2>Cooper, Charles</h2>

   Mobile Phone: <a href="tel:555-555-5555">555-555-5555</a><br />

   Work Phone: <a href="tel:555-555-6666">555-555-6666</a><br />

   E-mail Address: <a href="mailto:cooper@example.com">cooper@example.com</a><br />

   <a href="detail.html">More…</a>

  </div>


  <div data-role="collapsible">

   <h2>Davis, Donald</h2>

   Mobile Phone: <a href="tel:555-555-7777">555-555-7777</a><br />

   Home Phone: <a href="tel:555-555-8888">555-555-8888</a><br />

   Work Phone: <a href="tel:555-555-9999">555-555-9999</a><br />

   E-mail Address: <a href="mailto:davis@example.com">davis@example.com</a><br />

   <a href="detail.html">More…</a>

  </div>

 </div>

</div> 

</body>

</html>

I have already covered the basic of add the necessary JavaScript, CSS, and HTML 5 markup to a page in order to use JQM.  In this post I will focus how I have placed each contact record within a collapsible region.  This is accomplished by wrapping each contact record within a div that has a data-role attribute of "collapsible".   This replaces the definition list tags (dl, dt, dd) used to markup the XHTML version of the page. Within each div is a h2 heading tag that contains the text that will act as the label for each record.  Clicking these labels toggles the show/hide feature of each region.  The icons, label, and behavior has automatically been added by jQuery Mobile.


References


jQuery Mobile Project

http://jquerymobile.com

XHTML version of the page used in this post
http://www.customdatasys.com/jqm/start/index.html

The HTML 5 / JQM version of the page used in this post
http://www.customdatasys.com/jqm/v1/index.html


Friday, December 17, 2010

Adding jQuery Mobile to a Web Page

In this post I walk through the changes needed to change a simple mobile web page from an XHTML page to an HTML 5 page that uses jQuery Mobile (JQM).  This is the second in a series of blog posts in which I am exploring jQuery Mobile using the Alpha 2 release.  This first post in the series can be found at: http://wardlawclaims.blogspot.com/2010/12/introduction-to-jquery-mobile_16.html 
The page I will be using in this demonstration is a detail view page for a basic contact management web site. The page is used to display the contact information, phone numbers, email address, etc. for a single contact.


Here is a screen shot of the XHTML page in the iPhone 4 Safari browser.

Next is the XHTML for the detail page before I added jQuery.

<!DOCTYPE html PUBLIC "-//W3C//DTD XHTML Basic 1.1//EN"
    "http://www.w3.org/TR/xhtml-basic/xhtml-basic11.dtd">
<html xmlns="http://www.w3.org/1999/xhtml">
<head>
 <title>A Simple Site | Adams, Abel</title>
</head>
<body>
<div>
<a href="index.html">Contact List</a> || <a href="form.html">New Entry</a><br />
</div>

<h1>Adams, Abel</h1>


<p>
Mr. Abel Adams<br />
Organization: Example, Inc.<br /> 
Mobile Phone: <a href="tel:555-555-1111">555-555-1111</a><br />
Home Phone: <a href="tel:555-555-2222">555-555-2222</a><br />
Work Phone: <a href="tel:555-555-3333">555-555-2222</a><br />
E-mail Address: <a href="mailto:adams@example.com">adams@example.com</a><br />
</p>

<p>
101 Example Street<br />
Waco, Texas 76710<br />
<a href="http://www.example.com">http://www.example.com</a><br />
</p>

<p>
Birthday: August 4, 1961<br />
Spouse: Anne<br />
</p>


</body>
</html> 

Here is a screen shot of the page after it has been marked up as HTML 5 and the jQuery Mobile resources, JavaScript and CSS, have been added.

Here is the markup for the HTML 5 page.

<!doctype html>
<html>
<head>
 <title>A Simple Site | Adams, Abel</title>

 <!-- CSS and scripts required for jQuery mobile -->
 <link rel="stylesheet" href="jquery.mobile-1.0a2.css" />
 <script type="text/javascript" src="jquery-1.4.4.js"></script>
 <script type="text/javascript" src="custom-mobile-config.js"></script> <!-- this is a custom script file -->
 <script type="text/javascript" src="jquery.mobile-1.0a2.js"></script>
</head>
<body>
 
 <div data-role="page" data-theme="b">
    
  <div data-role="header">
   <div data-role="navbar">
    <ul>
     <li><a href="index.html">Contacts List</a></li>
     <li><a href="form.html">New Entry</a></li>
    </ul>
   </div> <!-- end navbar -->

   <h1>Mr. Abel Adams</h1>
  </div><!-- end header -->
 
  <div data-role="content">
   <p>
   Mr. Abel Adams<br />
   Organization: Example, Inc.<br /> 
   Mobile Phone: <a href="tel:555-555-1111">555-555-1111</a><br />
   Home Phone: <a href="tel:555-555-2222">555-555-2222</a><br />
   Work Phone: <a href="tel:555-555-3333">555-555-2222</a><br />
   E-mail Address: <a href="mailto:adams@example.com">adams@example.com</a><br />
   </p> 
  
   <p>
   101 Example Street<br />
   Waco, Texas 76710<br />
   <a href="http://www.example.com">http://www.example.com</a><br />
   </p> 
 
   <p>
   Birthday: August 4, 1961<br />
   Spouse: Anne<br />
   </p>
   
   <p>
   Notes:<br />
   Is senior manager at Example,Inc.<br />
   Hobbies are golf and poker<br />
   </p>

  </div> <!-- end content div -->
  
 </div> <!-- end page div -->
</body>
</html> 

Using HTML 5
I started with changing the doctype from the XHTML Basic doctype to the HTML 5 doctype.  The jQuery Mobile framework makes use of HTML 5's custom data attributes.  These are the attributes "data-*" seen in the markup above and are a feature of HTML 5 intended to allow authors to associate arbitrary data with HTML elements in order to expose that data to custom JavaScript.  JQM uses these data attributes to apply styling and behavior to sections of the page.  Later in the process when I work on marking up a data entry form I will also be using the new input types introduced in HTML 5.


Adding the jQuery Mobile Resources
In the head element I've added the CSS and JavaScript resources required by the framework.  In addition I've referenced an additional custom JavaScript file (custom-mobile-config.js) that contains the settings that I wish to override in the JQM defaults.  I plan to cover the contents of this file in a future post.

<!-- CSS and scripts required for jQuery mobile -->
 <link rel="stylesheet" href="jquery.mobile-1.0a2.css" />
 <script type="text/javascript" src="jquery-1.4.4.js"></script>
 <script type="text/javascript" src="custom-mobile-config.js"></script> <!-- this is a custom script file -->
 <script type="text/javascript" src="jquery.mobile-1.0a2.js"></script>

Adding jQuery Mobile to the Markup
The JQM framework includes roles that specify areas of your page as header, content, footer, and navigation.  The entire body of the page has been wrapped in a div with the data-role attribute with the value of "page" and a data-theme attribute.  The data-role of "page" defines the marked up content as a JQM page and applies CSS.  The optional data-theme attribute applies an alternate set of styles.  JQM includes some predefined themes.  I have not experimented with defining my own theme but I assume that a theme-roller or other customization method does or will exist for creating and modifying themes.

I have wrapped my page heading in a div with a data-role of "header" which I have included a "navbar" in order to create navigation at the top of the page.  Navigation items are wrapped in an unordered list and the page's heading is wrapped in an h1 tag.

I have wrapped the rest of the page's markup in a "content" div and it contains the same content as the original XHTML version of the page.  JQM takes care of applying the CSS based on the data-role of "content" and the theme that I specified in the "page" div's data-theme attribute.  If you inspect the resulting page's DOM with the Chrome browser's development tools you will see that JQM has applied a added an number of styled elements to the basic markup.


References 
jQuery Mobile Project

http://jquerymobile.com
HTML 5 Custom Data Attributes
http://www.w3.org/TR/html5/elements.html#embedding-custom-non-visible-data-with-the-data-attributes
XHTML version of the page used in this post
http://www.customdatasys.com/jqm/start/detail.html 
The HTML 5 / JQM version of the page used in this post
http://www.customdatasys.com/jqm/v1/detail.html

Thursday, December 16, 2010

Introduction to jQuery Mobile

The jQuery Project team has developed a JavaScript and CSS framework targeted at mobile devices.  The jQuery Mobile (JQM) project include a set of JavaScript, CSS, and images to apply style and behavior to a web page that is similar to a mobile application such as an iPhone app.  As of time of this post the jQuery Mobile Framework is available in a alpha version.

I have created a simple web site consisting of three XHTML pages that mimic a simple contact management web application.  Note that I have only created a bare bones front-end that uses only XHTML markup, it does not contain any JavaScript, images, CSS, or a back-end database.  I will demonstrate how JQM and HTML 5 markup has been added to each page to add the JQM framework.

index.html
The home page for the site is list of contacts that displays each contacts phone number, email address and link to more information.  Please note that each contact links to the same details page.

detail.html
This page lists detailed information for a contact.

form.html
This page allows entry of a new contact.  It is here to demonstrate the styling and behavior that JQM applies to form elements.

References

jQuery Mobile Project
http://jquerymobile.com/

XHTML Contacts Site
http://www.customdatasys.com/jqm/start/

jQuery Mobile Contacts Site
http://www.customdatasys.com/jqm/v1/

Wednesday, August 4, 2010

Set a Default Date in Dynamics CRM 4.0 Using JavaScript

This blog will demonstrate how to set a default due date for the Phone Call entity in Dynamics CRM 4.0 by using a little bit of JavaScript.

T0 start go to Settings-->Customization-->Customize Entities. Scroll down to Phone Call and edit it by double-clicking or selecting More Actions and Edit from the toolbar.


Next, select Forms and Views and edit the Form. Select Form Properties and click the Edit button for the OnLoad Event. Copy the following code into the editor and click OK.

var CRM_FORM_TYPE_CREATE = "1";
var DUE;
var TODAY;

// Only make these changes when the form is opened in Create mode.
if (crmForm.FormType==CRM_FORM_TYPE_CREATE)
{
// Get today's date.
TODAY = new Date();

DUE = TODAY.setDate( TODAY.getDate());
crmForm.all.scheduledend.DataValue = DUE;
}


Now let's test our work by selecting Preview and Create Form. You will notice that the default value for Completed Date is now the current date and time. Note that I changed the "Due" to "Completed" date on the form editor.